AWS - S3 restricted access using OAI
awsA typical setup for the Cloudfront CDN distribution would be to configure an S3 bucket as a public website and configure the S3 pucket as the distribution origin for Cloudfront.
The side effect of such a configuration is that your website can now be accessed both using the Cloudfront domain name (www.example.com) or using the public website generated by AWS for the bucket on which website hosting is enabled (http://BUCKET-NAME.s3-website-us-east-1.amazonaws.com/).
AWS offers the posibility for Cloudfront to serve a website stored in a private S3 bucket, as long as access to read the files from the specific bucket is given.
Please follow the steps below to accomplish this configuration.
S3 recommended configuration
In S3, it is recommended to Disable Static website hosting and Block all public access into the private bucket.
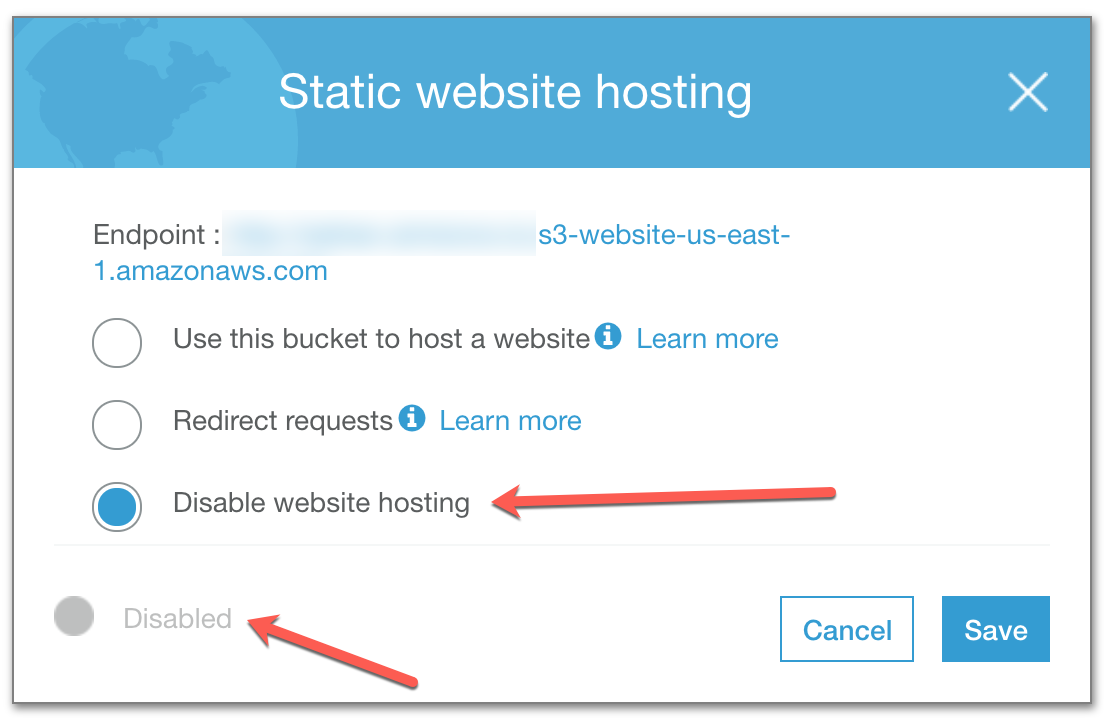
Disable static website hosting
In S3, select the bucket where we are hosting the static file which will be server by Cloudfront. Make sure at the end, Access field mentions “Bucket and objects not public”.

Once you selected the bucket, click on bucket properties.

Inside the properties tab, make sure Static website hosting is disabled. Edit the settings and disabled static website hosting if needed.
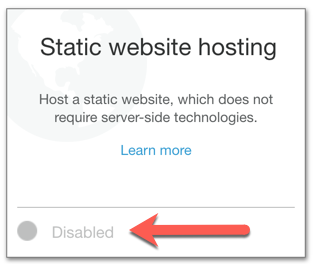
Save settings to make sure static website hosting is disabled.
Block all public access
To block all public access to the private bucket, select Permissions tab.

In the Permissions tab, click on Block public access tab.

Set settings as needed and save the configuration.

Not that the S3 configuration is done, let’s move to the Cloudfront configuration.
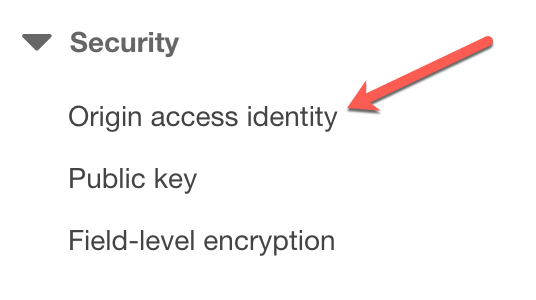
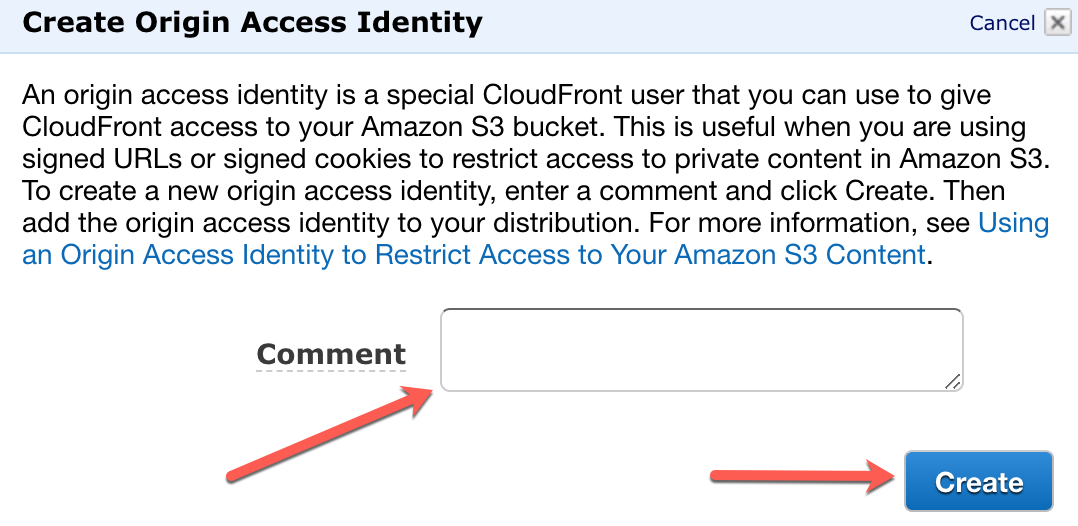
First we will need to create an Origin access identity. This will be done under main Cloudfront settings, under the Security settings.
Click on Create Origin Access Identity:
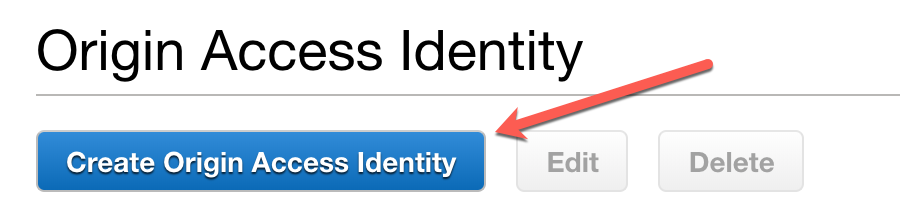
Give it a name and save the newly create OAI.
At the time of writting AWS had a limit of 100 different Origin Access Identities for Cloudfront, but because it can be reused between multiple distributions, in reality a single identity is all we might need.
Now that the new Origin Access Identity is created, it needs to be assigned to the Cloudfront distribution which requires access into the private S3 bucket. To do that, select the Cloudfront distribution:
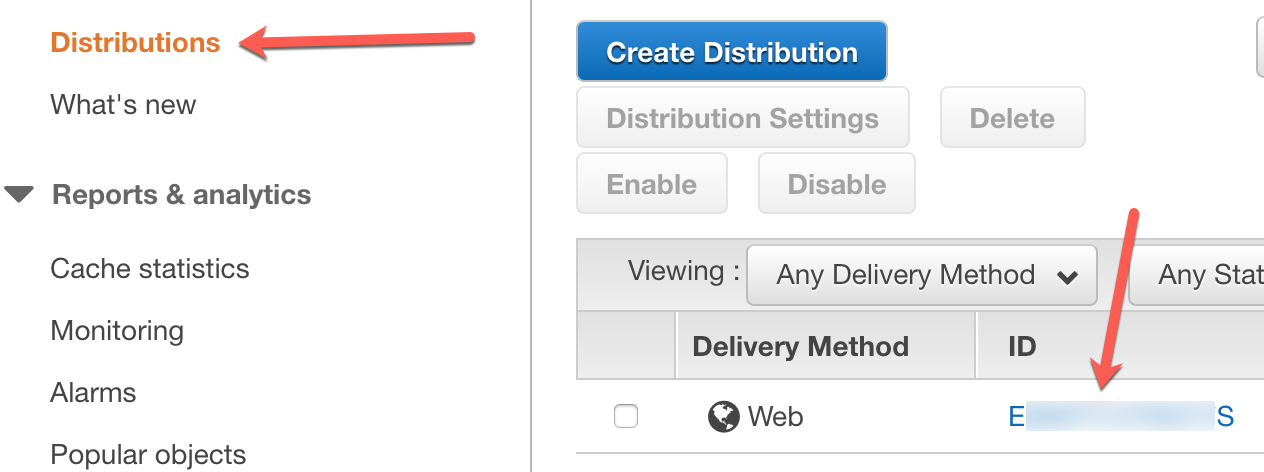
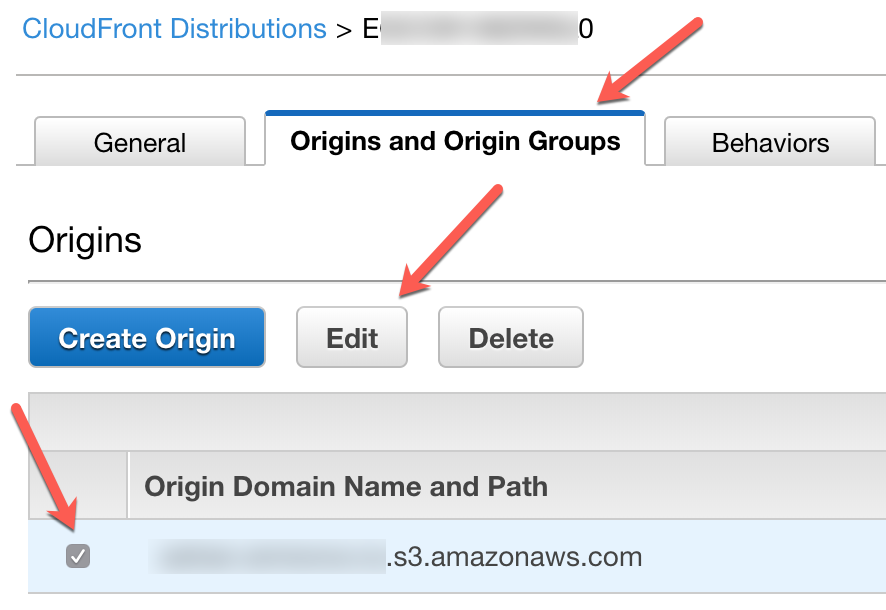
Under the Origins and Origin Groups tab, select the distribution we want to edit and click Edit.
If restrict Bucket Access setting is not present, make sure you empty the Origin Domain Name field and choose a new bucket from the list, even if it is the same bucket as before. Select Restrict Bucket Access, use the existing Identity which we created earlier, allow Cloudfront to Update Bucket Policy and save.
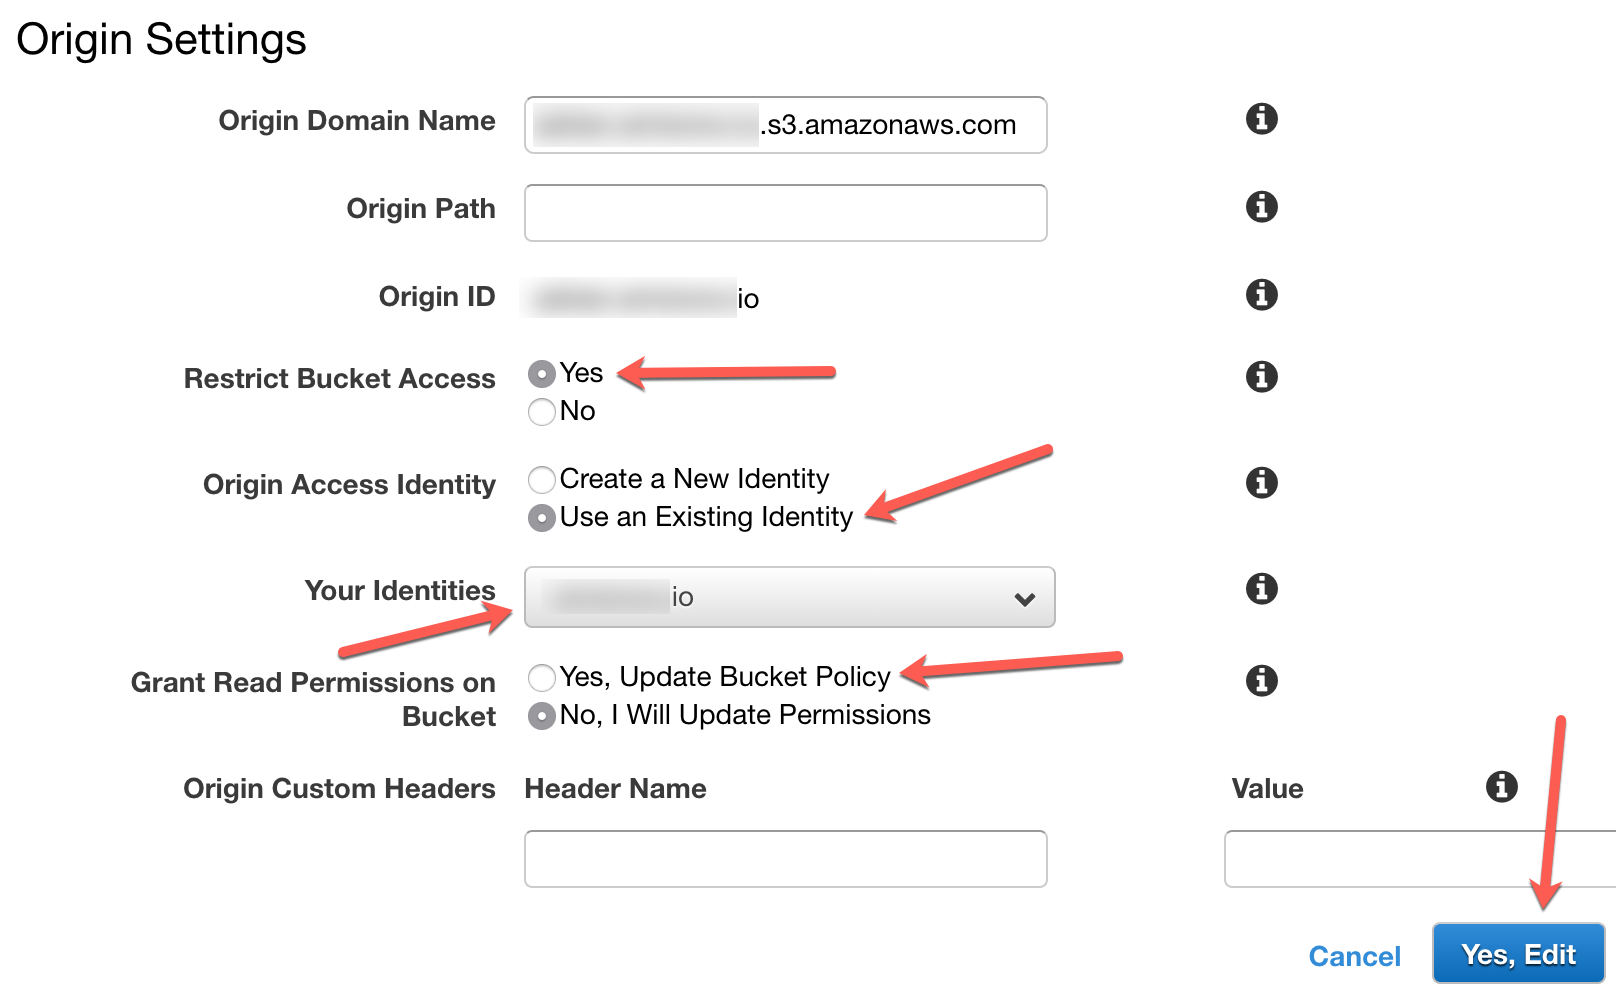
Cloudfront should create a bucket policy similar to the one below on your behalf and update the bucket settings.
{
    "Version": "2008-10-17",
    "Id": "PolicyForCloudFrontPrivateContent",
    "Statement": [
        {
            "Sid": "1",
            "Effect": "Allow",
            "Principal": {
                "AWS": "arn:aws:iam::cloudfront:user/CloudFront Origin Access Identity <ID>"
            },
            "Action": "s3:GetObject",
            "Resource": "arn:aws:s3:::<BUCKET>/*"
        }
    ]
}
Poorly defined link anchors
A big difference between hosting an S3 bucket as an website and restricting the access as explain in this post is that now /index.html must always be used in internal links. If an internal link will have an anchor of /about/ for example instead of /about/index.html, Cloudfront will reply with a 404 Error. Setting OAI as a Security measure can break an existing website which was poorly written and did not take into account fully defined anchors. Test before production, as always.
I hope you enjoyed this short tutorial and do let me know in the comments if you ever broke a production website by implementing this security measure.